
Creating Individual Receipt Activities
Receipt activities in DonorDock may be generated from Transactional Templates. Receipts may be created using receipt icons when viewing lists of gifts or directly from a specific gift record.
Generate a Receipt using Receipt Icons
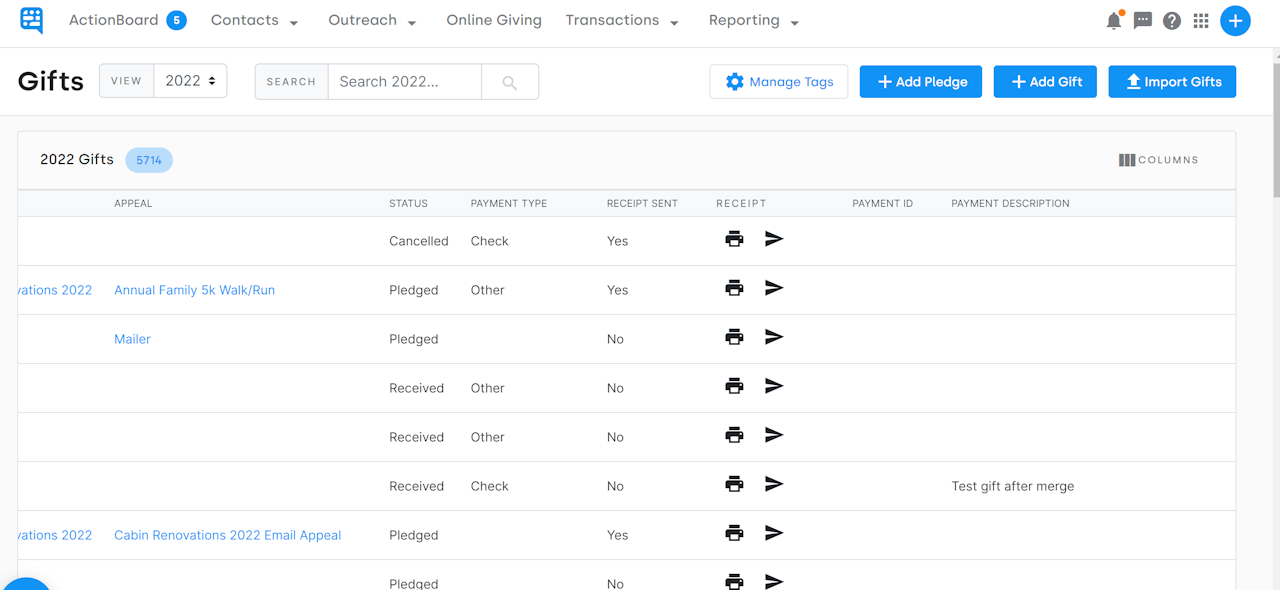
Receipt icons will appear in the Receipt column when viewing lists of gifts in DonorDock. Lists of gifts in DonorDock may be viewed through:
The Contact record in the Gift box
A Giving Page Dashboard
Transactions > Gifts
Transactions > Campaigns > Campaign details page
Transactions > Appeals > Appeal details page
Transactions > Funds > Fund details page
The Receipt column will be located to the right of the lists of gifts. Select the printer icon to Print or the send icon to Email
Select the Transactional Template
If Printing, click to Download
If Emailing click to Send
Generate a Receipt directly on the Gift Record
Navigate to the Gift details page. A specific gift details page may be accessed through:
The Contact record in the Gift box or Gift Timeline
A Giving Page Dashboard
Transactions > Gifts
Transactions > Campaigns > Campaign details page
Transactions > Appeals > Appeal details page
Transactions > Funds > Fund details page
A Gift Report > Expand row > Open gift record
ActionBoard Nudge > View Gift
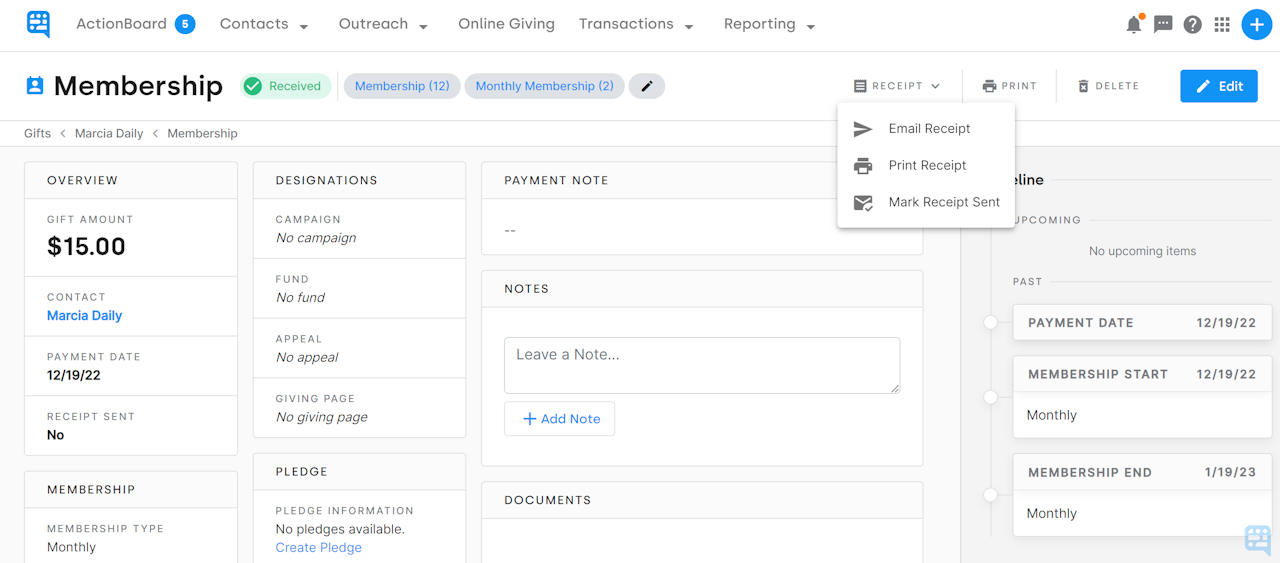
Select the Receipt action at the top of the gift record page
Select Email Receipt or Print Receipt
Select the Transactional Template in question
If Printing, click to Download
If Emailing click to Send
🙋🏽♀️ What if I already sent a receipt or thank you card outside of DonorDock?
If you have already sent an acknowledgement of the gift outside of DonorDock, when on the gift record, you may click on the Receipt option and select the third option "Mark Receipt Sent" and the value for Receipt sent will update from False/No to True/Yes.

